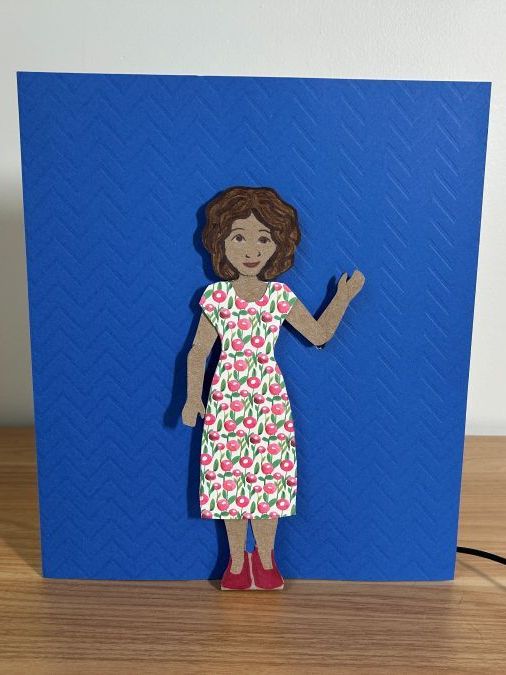
Waving Paper Doll
Make a paper doll wave using a servo motor!
Materials
Arduino Uno R4 Wifi
Micro Servo 9g SG90 Motor
Male-to-Male Dupont Wires
Foamcore
X-acto Knife
Mounting Putty
Hot Glue
Scrapbook Paper
Thin Cardboard
Markers
Colored Pencils
Set Up the Arduino Circuit Board
For this project, we will be starting with example code included with the Arduino software. If you are just starting out with the Arduino Uno board, make sure you plug it into your computer with a USB / USB-C cord and install the relevant driver for your computer to recognize the Arduino board and the Arduino IDE software for writing programs to run on the Arduino board. Refer to the arduino website for any assistance with this step!
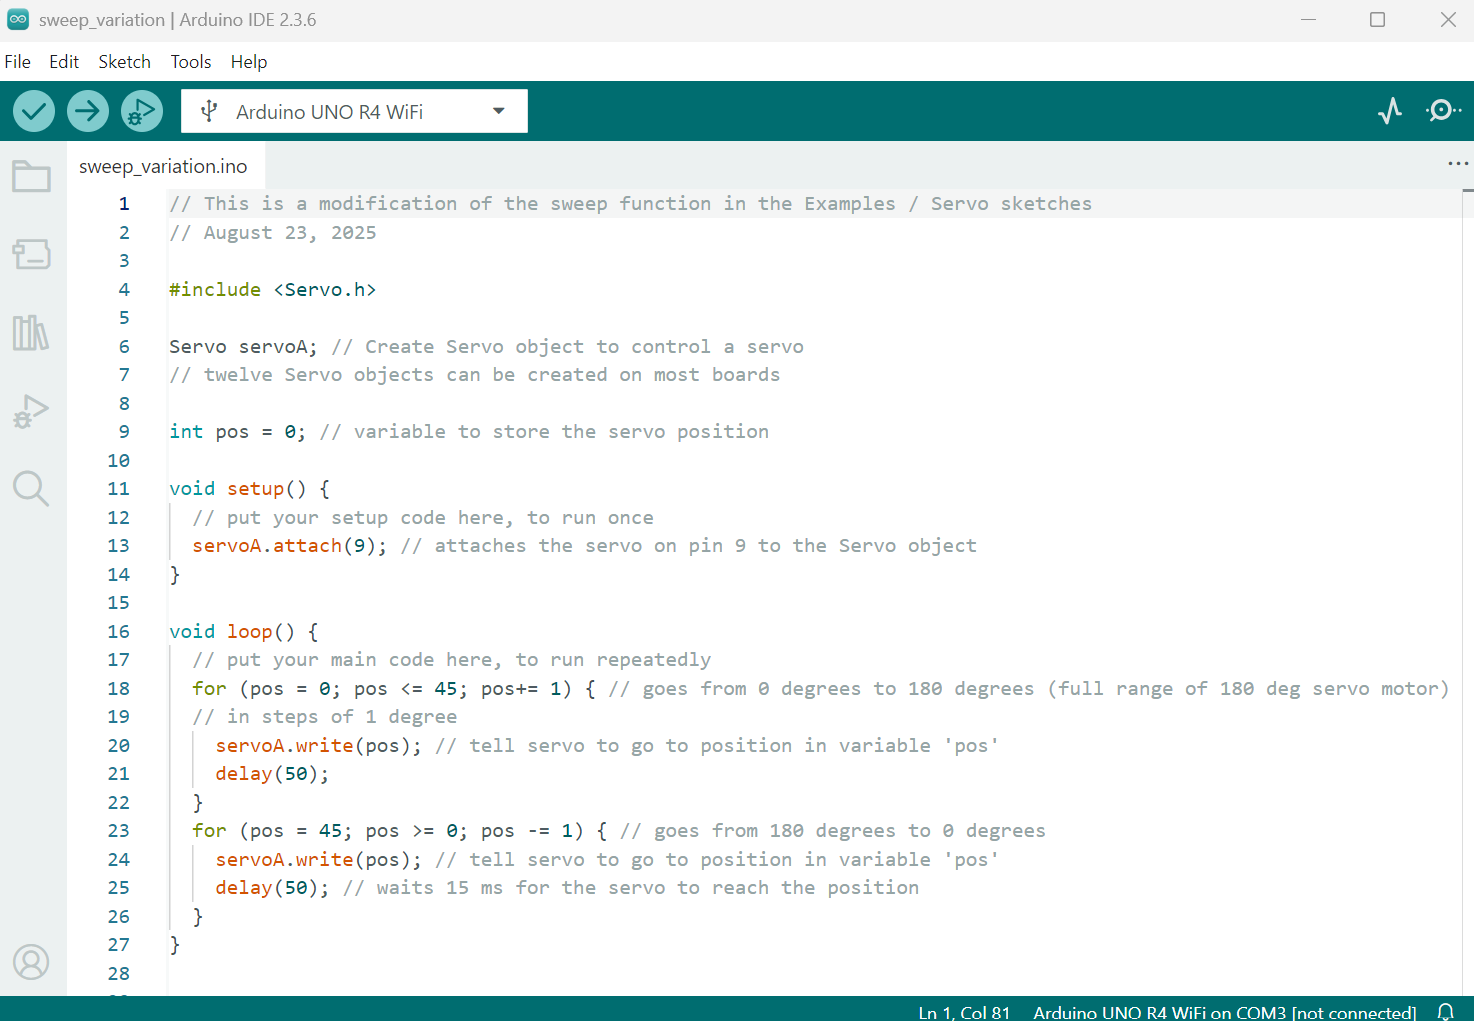
Next, we are going to be opening the Arduino IDE, the program used for writing program code that will be uploaded to the Arduino board. The Arduino IDE is very user friendly and comes with example code. We are going to start by opening example code stored under the File menu. Navigate to File / Examples / Servo / Sweep. The Sweep code was created by BARRAGAN, of http://barraganstudio.com, with modifications by Scott Fitzgerald, https://www.arduino.cc/en/Tutorial/LibraryExamples/Sweep.
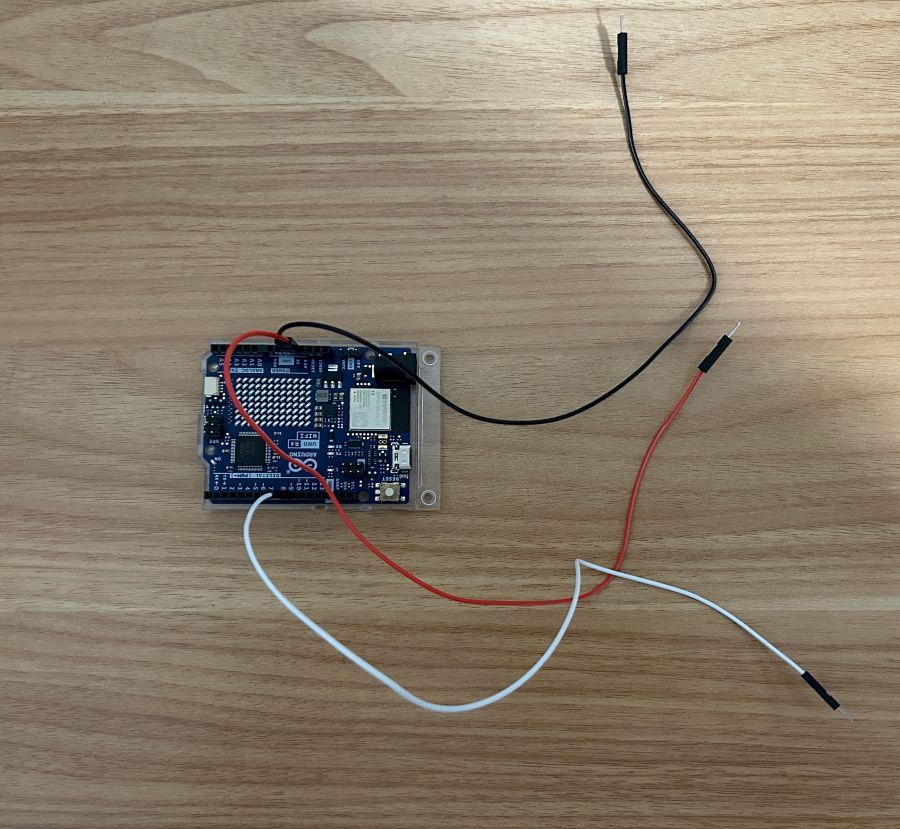
With the Sweep function open, we are going to wire the Arduino board. We can see that at line 18, there is a reference to a signal being sent to pin 9 on the arduino board. There are 3 wires attached to the servo motor - a yellow one, a red one, and a brown one. The servo motor will need to have a wire attached to power, ground (GND), and a control signal. Plug the pin of the white Dupont wire into slot 9 on the DIGITAL (PWM) section of the Arduino board. Then, plug a red Dupont wire pin into the 5V slot on the POWER section of the Arduino Board. Finally, plug the pin of a black Dupont wire into the GND slot on the POWER section of the Arduino Uno Board.
Connect the Wires to the Servo Motor
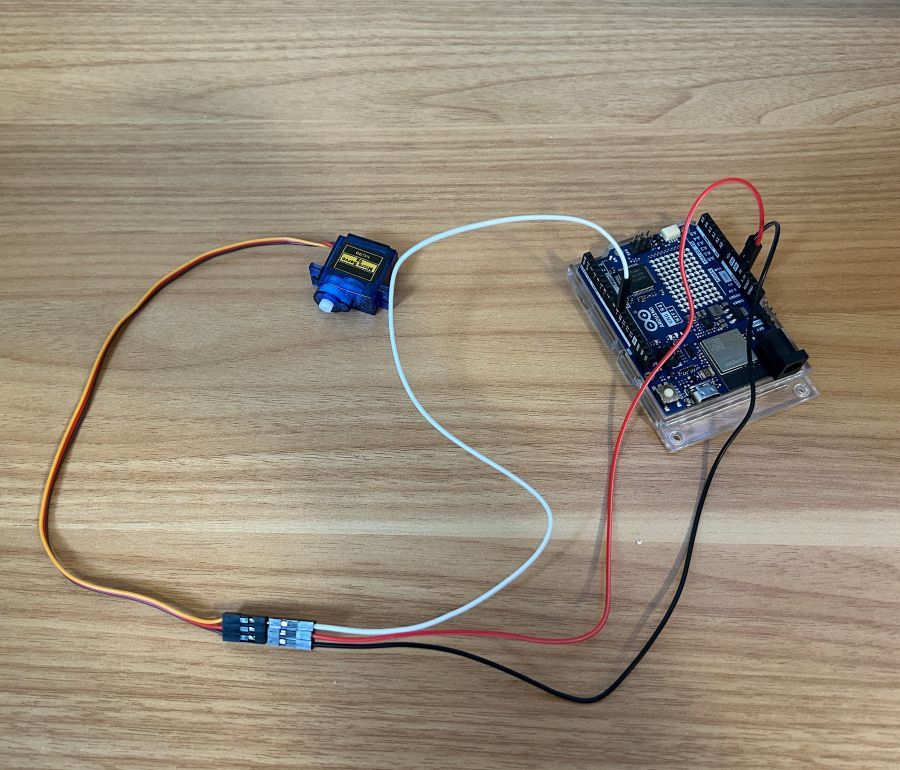
The servo motor has three wires joined together at the ends with a female connector with slots to connect to each wire. For the white Dupont wire with one pin connected to slot 9 on the Arduino Uno, plug the other pin into the servo wire harness connector at the slot facing the yellow wire. For the red wire plugged into 5V on the Arduino board, plug the pin on the other end into the slot facing the red wire of the servo motor. Lastly, for the black wire plugged into the Arduino GND slot, plug the pin into the slot facing the brown wire on the servo motor wire harness connector.
Attach a fin to the spindle on the motor (white circular plastic piece).
Modify the Sweep Function
Return to the Arduino IDE software application on your computer. View the Sweep function included in the example programs that are included with the Arduino IDE, available under File / Examples / Servo / Sweep. Connect the Arduino board to your computer using a USB cord. Upload the Sweep function to the Arduino board. The motor should spin the fin attached to the spindle.
Next, modify the Sweep function so that instead of rotating up to 180 degrees, it rotates at 45 degrees. In line 22 and 27 of the sweep function, where it says 180 degrees, you will replace 180 with 45. Then, adjust the delay between each movement. In the original function, it is delayed by 15 ms, and in this modification, I adjusted it to have a delay of 50 ms so that it moves at a slower speed.
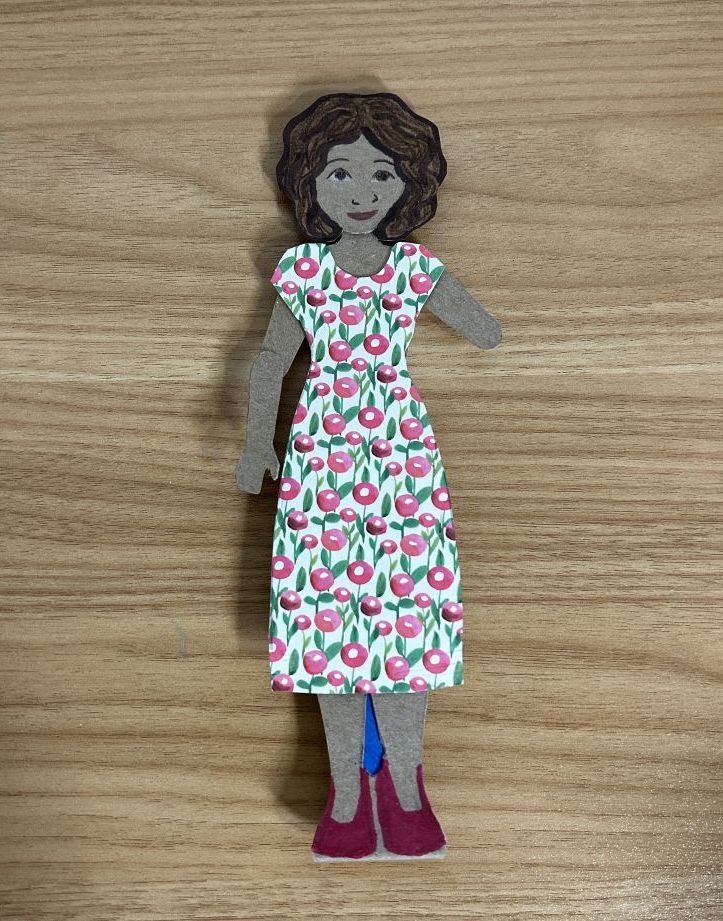
Create a Paper Doll
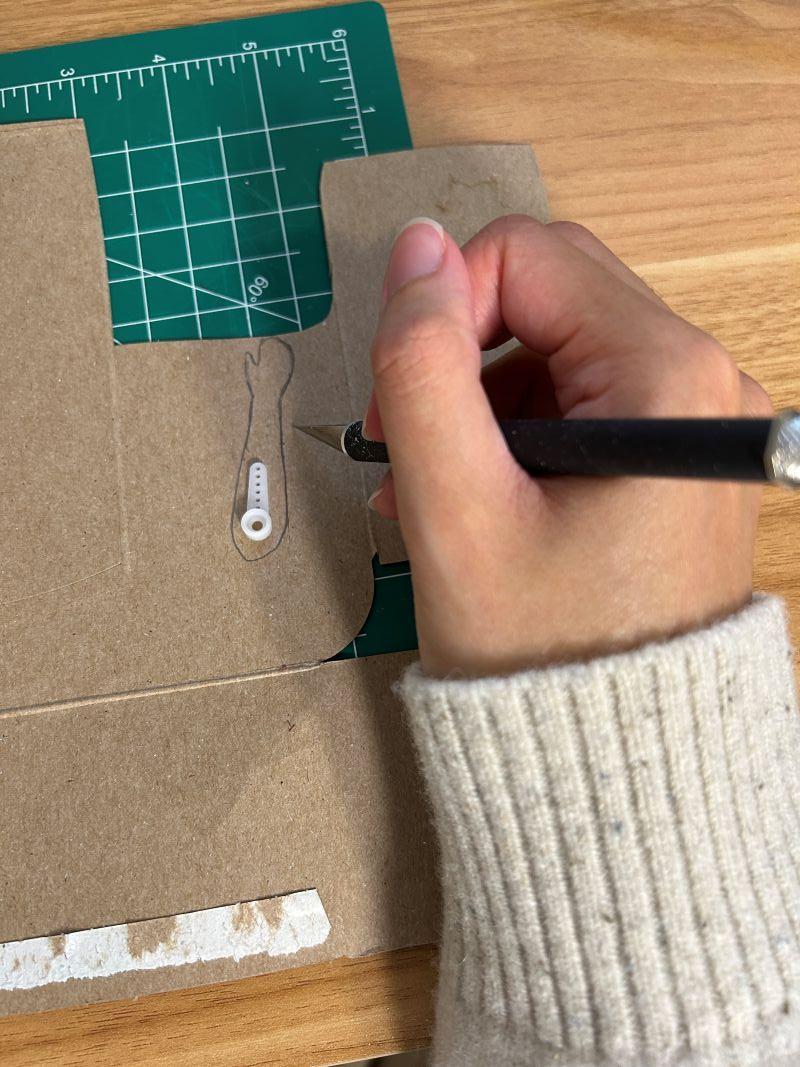
Next, draw a paper doll on cardboard or card stock. I recycled cardboard from a box of icecream bars. It is good to place the fin on the cardboard to keep in mind the size of the paper doll to draw. I made the part of the arm that moves a separate piece from the rest of the paper doll. Draw in whatever features you would like the doll to have - use colored pencils and markers to draw a face and hair.
After drawing the paper doll and the mobile arm on the cardboard, cut it out using an x-acto knife or a box cutter. If you are working with children, it is okay to use scissors instead. Draw clothing for the doll on scrapbook paper and cut it out. I used mounting putty (sticky tack) to attach the clothing to the paper doll because it is easy to adjust and change if needed.
Trace the shape of the doll on a sheet of foamcore, excluding the arms, and cut it out to give the doll dimension. Attach to the back of the paper doll with mounting putty.
Create a Wall Structure
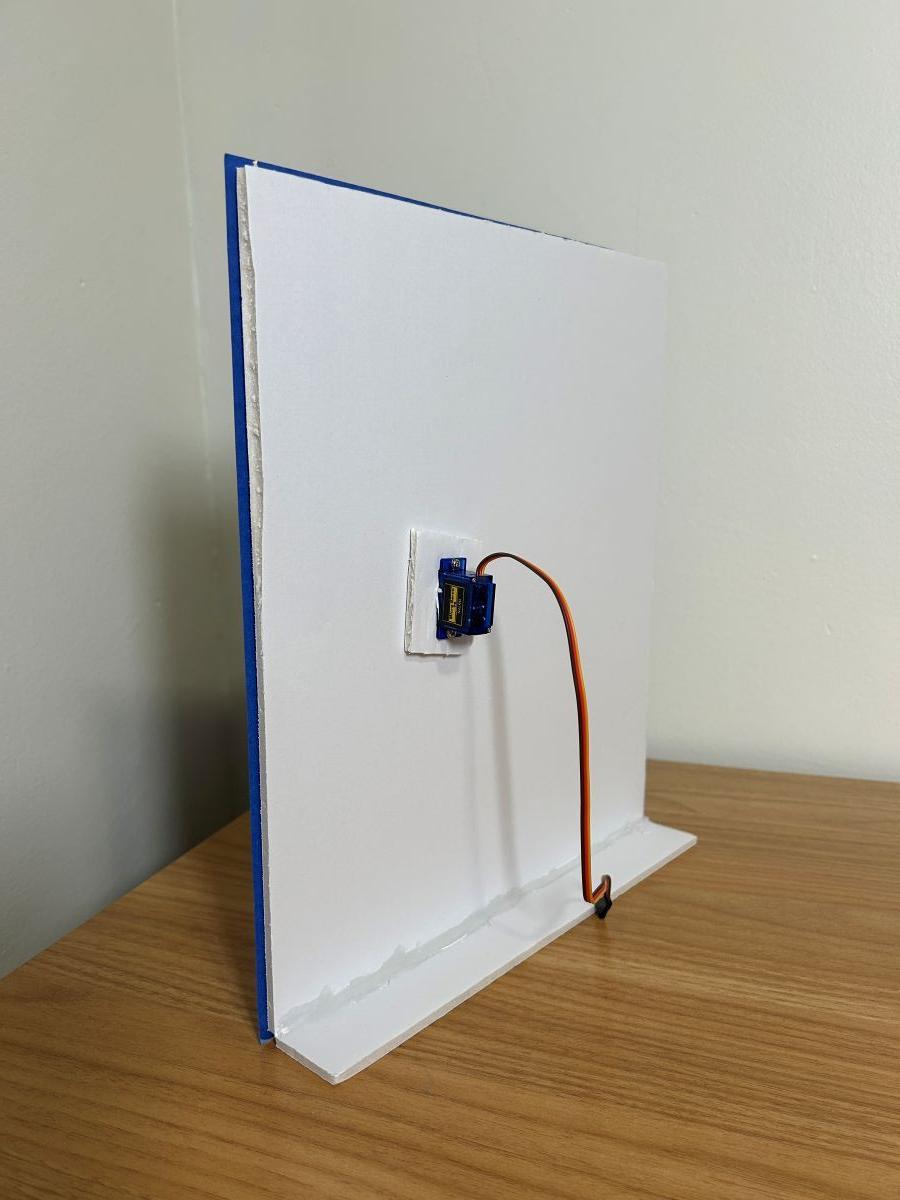
Cut a wall from a sheet of foamcore with an extra 2 inches at the bottom of the intended height. Partially cut one side of the foamcore along a horizontal line 2 inches from the bottom of the foamcore wall. Bend the foamcore at the 2 inch partial cut at a right angle. Hot glue the right angle in place on both sides of the bent foamcore edges.
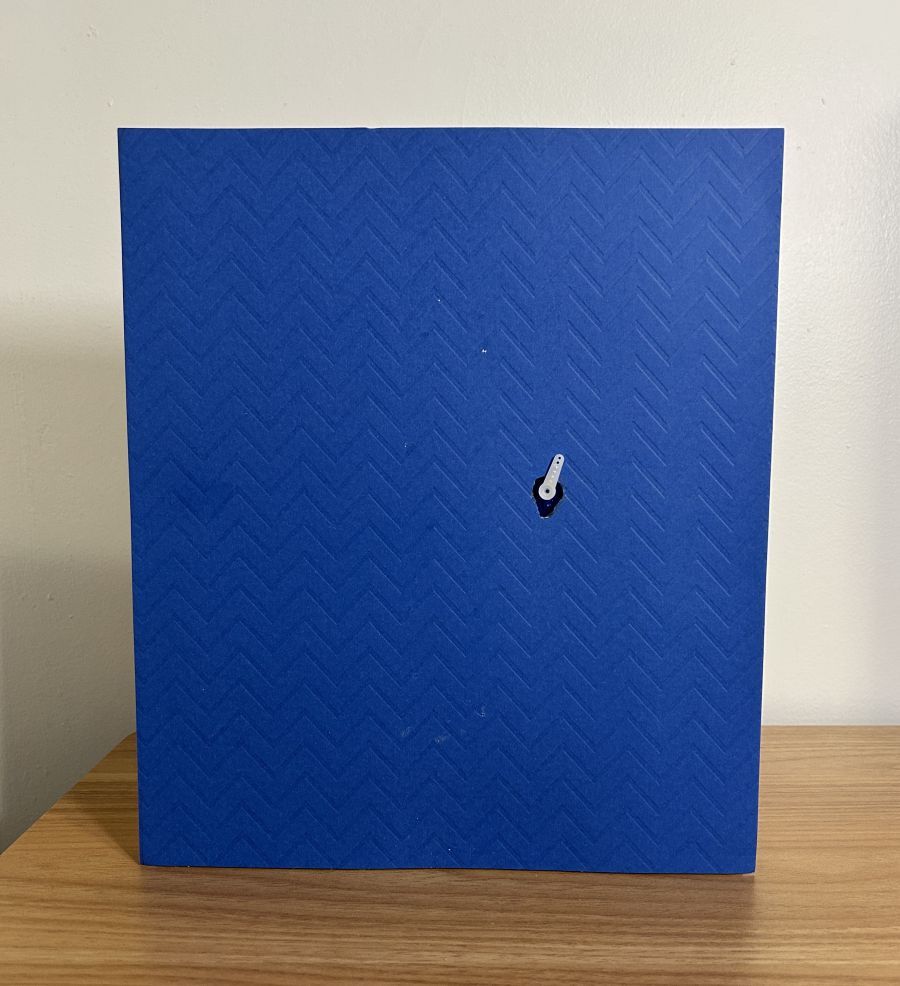
Select a sheet of scrapbook paper that would look nice as a background on the wall. Cut the sheet to the size of the foamcore wall. Use glue or mounting putty to attach the scrapbook paper to the foamcore wall.
Arrange the paper doll so that is in the location you would like for the final model. Decide where the elbow of the doll will be, the axis of rotation for the waving arm. Draw a point under that axis directly on the wallpaper. Cut out a circle for the spindle of the motor.
Create a cradle out of a second piece of foam core by cutting out a rectangle in the shape of the motor cross-section. Mount it to the back of the foamcore wall with mounting putty.
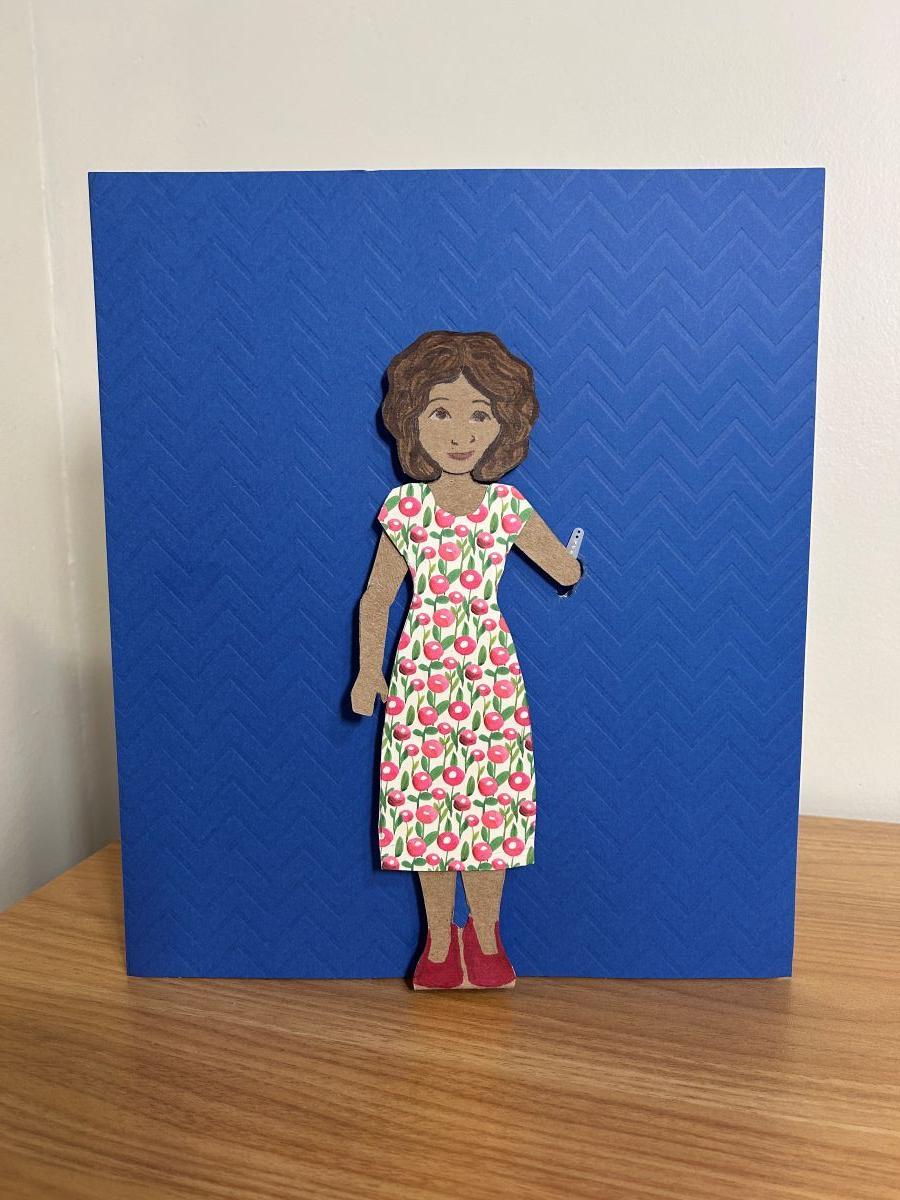
Mount the Doll to the Wall
Mount the paper doll to the front of the wall by placing mounting putty between the foamcore on the back of the doll and the front wallpaper.
Attach the mobile paper arm to the fin on the spindle of the servo motor.
Play the Wave
Connect the Arduino Uno to the computer to power on the assembly. Use a USB-C / USB cord to make the connection.
Watch the paper doll wave!